Choosing the right Dual Crown Fork begins with the rider, not the product label. Downhill racers, bike-park regulars, and enduro riders demand different support, travel, and steering behavior. A fork that feels calm on a steep race track may feel heavy and awkward on everyday trails. That difference matters.
Jordi Cortes, a respected FOX suspension specialist, has shared a useful principle: “There is no perfect setup, only the right compromise for the rider and the track.” This idea should guide every Dual Crown Fork decision. Check the frame’s approved travel, head-tube design, wheel size, axle standard, and crown clearance. Measure carefully. A few millimeters can change front-end height and handling.
Stiffness is valuable, but maximum stiffness is not always better. It can reduce comfort on rough, repeated impacts. Travel must match the frame’s geometry and intended use. Compression adjustment, rebound range, spring type, and service access also deserve close attention. A dependable fork should remain predictable after long descents, not only feel impressive during a short test ride.
Real experience reveals small weaknesses. Some forks feel excellent but require frequent tuning. Others weigh more yet track confidently through loose rock. I have learned that online specifications rarely tell the whole story. Rider weight, riding speed, and local terrain can change the answer completely. Choose carefully. Test honestly. The best Dual Crown Fork supports control without making the bicycle feel unnecessarily difficult.
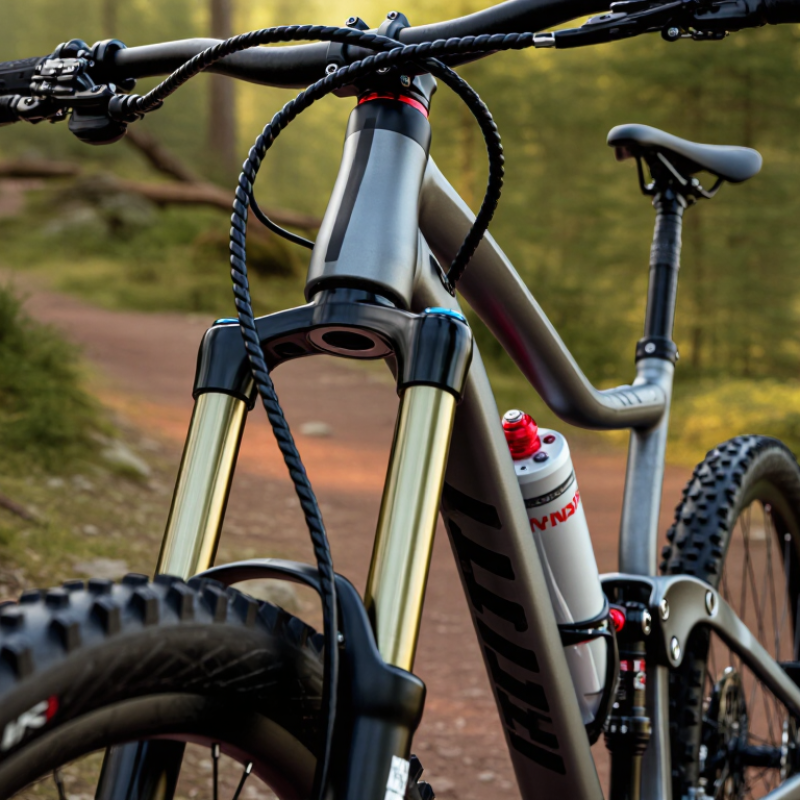
A dual crown fork uses two crowns to connect the fork legs to the steerer tube. The upper and lower crowns spread steering loads across a larger area. This layout improves torsional stiffness during hard braking, landings, and steep descents. It is not magic. In workshop inspections, I check crown alignment, bushing play, axle security, and visible damage before judging performance.
The design supports controlled suspension movement. Stronger fork legs can track rough ground more accurately, especially when the front wheel meets rocks or square edges. However, stiffness is not automatically better. A very rigid fork may transmit more vibration through the handlebar and make setup less forgiving. I have learned that spring rate, damping, and rider weight must work together. That detail is easy to miss.
Dual crown forks mainly serve downhill, freeride, park, and selected enduro applications. They suit steep terrain, repeated jumps, and high-impact riding where precise steering matters. For ordinary trail riding, their added weight and limited frame clearance may become inconvenient. Check frame compatibility, steerer length, travel limits, wheel size, axle standards, and brake clearance. Measure twice. A fork that fits the head tube may still interfere with the frame or alter handling dangerously. My first setup review focused too much on stiffness; real trail testing showed that balance and usable travel mattered more.
When choosing a dual crown fork in 2026, compare specifications before appearance. Start with travel. Downhill setups commonly use 180–200 mm, while freeride bikes may need a different range. The Grand View Research Mountain Bike Market Report 2024 estimates continued growth in gravity-oriented mountain biking, increasing demand for stronger, more adjustable suspension. Travel must match the frame’s geometry. Excessive travel can raise the front end and slow steering.
Check axle size, crown spacing, and steerer diameter carefully. A 20 mm thru-axle usually offers better torsional control than lighter systems. Confirm clearance for the front hub and brake rotor. Small mismatches create expensive problems. Also compare offset, which often ranges from about 44 to 56 mm on modern downhill forks. More offset can make steering calmer, but it may feel less responsive on tight, slow trails.
Damping is equally important. Look for separate high-speed and low-speed compression adjustments, plus usable rebound control. The 2023 Bicycle Product Suppliers Association industry report recorded stronger consumer interest in performance-focused bicycles, but specifications alone do not guarantee better handling. I sometimes overvalue stiffness and ignore setup quality. That is a mistake. A 200 mm fork with poorly matched spring pressure can feel harsh and vague. Measure sag, test compression settings, and record changes after each ride. Weight, riding speed, terrain, and frame compatibility should decide the final specification.
2026 How to Choose the Right Dual Crown Fork?
Matching Fork Travel and Wheel Size to Your Riding Style
Your riding style should guide fork travel more than fashion. For downhill tracks, 190–200 mm travel offers useful support on steep landings and rough braking zones. A shorter 170–180 mm fork can suit aggressive park riding with smaller drops. It may feel quicker through tight turns. However, excessive travel can raise the front end and change the bicycle’s handling. Check the frame’s approved travel before buying.
Wheel size changes the fork’s clearance and steering behavior. A 29-inch wheel rolls smoothly over roots, square edges, and rock gardens. It also needs enough arch clearance for your tire and mud. A 27.5-inch wheel feels more agile between trees and on compact jump lines. Mixed-wheel setups can work well, but axle-to-crown length and offset still matter. Measure them carefully. Small errors can create a surprisingly nervous front end.
I compare the current fork’s axle-to-crown height, offset, steerer length, and brake position. Then I inspect the head tube, crown clearance, and tire width. On one setup, I chose more travel than necessary and lost precision on steep turns. That mistake changed my view. More suspension is not automatically better. Riders under 70 kilograms may need different air pressure and damping support than heavier riders. A qualified mechanic should confirm compatibility, especially with dual crown loads and frame limits. Test setup gradually, because the first ride can feel misleading.
Use this comparison to match front suspension travel, wheel diameter, chassis stiffness, and terrain demands before selecting a dual crown fork.
| Riding Style | Recommended Wheel Size | Typical Dual Crown Travel | Suitable Terrain | Key Fork Characteristics | Recommended Setup Direction | Main Benefits | Potential Trade-Offs |
|---|---|---|---|---|---|---|---|
| Downhill Racing High-speed timed descents |
27.5 in for agility 29 in for rollover speed Mullet layouts may suit mixed requirements |
200 mm is the most common target; some frames are designed around approximately 190–203 mm | Steep race tracks, rock gardens, large compressions, jumps, and high-speed braking zones | Large chassis, high torsional stiffness, strong axle system, external compression and rebound adjustment, and a frame-compatible axle-to-crown length | Begin with sag and damping settings recommended by the fork manufacturer. Use enough low-speed compression to control braking dive without making small bumps harsh. | Maximum control and impact capacity; stable steering under heavy braking; improved traction on rough descents | Higher weight, slower steering response, and limited compatibility with frames designed for shorter travel |
| Bike Park Laps Repeated lift-access riding |
27.5 in for quick direction changes 29 in for smoother rollover Mullet setups depend on frame clearance |
180–200 mm, depending on the frame and the balance between agility and stability | Jump lines, berms, machine-built trails, repeated drops, and mixed technical features | Strong steering support, reliable heat management, broad damping adjustment, and serviceable lower-leg and damper components | Choose travel that matches the frame's approved specification. Use a slightly more supportive compression setting for landings and berms. | Durable handling for repeated hard impacts; predictable support during jumps and fast transitions | Can feel excessive on mellow trails; additional unsprung and total bike weight may reduce playfulness |
| Freeride Jumps, drops, and creative lines |
27.5 in for a compact and responsive feel 29 in for greater rollover and landing stability |
180–200 mm; select the shortest travel that provides the required bottom-out margin and matches the frame | Natural features, large jumps, drops, steep chutes, and technical freeride lines | High stiffness-to-weight ratio, adjustable progression or bottom-out control, strong crown and steerer construction, and precise mid-stroke support | Prioritize supportive mid-stroke and bottom-out resistance. Check that the frame can handle the fork's axle-to-crown height and intended loads. | Confident landings, accurate steering, and strong support when loading the bike for takeoffs | Too much travel can raise the front end, slacken handling, and alter frame geometry beyond the intended design |
| Technical Enduro Steep and difficult all-mountain riding |
29 in for rollover efficiency Mullet configurations for a more compact rear end and quicker rear-wheel movement |
170–180 mm where the frame is specifically approved for a dual crown; 200 mm is usually unnecessary | Steep technical descents, repeated rock sections, off-camber trails, and occasional bike-park use | Controlled chassis stiffness, sensitive small-bump performance, moderate weight, and damping that preserves traction over long descents | Verify frame compatibility first. Use balanced compression and rebound settings rather than maximum stiffness or maximum travel. | More precise steering and braking control than many single-crown setups; useful support on steep terrain | Reduced climbing comfort, possible frame warranty limitations, and a narrower range of compatible frames |
| Big-Mountain Riding Long, steep, and rough descents |
29 in for obstacle rollover Mullet setups can improve rear-wheel maneuverability |
180–200 mm, selected according to frame geometry, rider mass, and impact frequency | Alpine terrain, loose chutes, long rock gardens, high-consequence lines, and natural trail features | Strong torsional stiffness, reliable damping under heat, robust seals and bushings, and effective hydraulic bottom-out control | Use a pressure and damping setup that maintains travel usage without frequent harsh bottom-outs. Inspect steering clearance at full compression. | Stable tracking and improved confidence when the trail becomes fast, steep, and highly irregular | More demanding transport and maintenance; slower low-speed handling and less efficient climbing |
| Mixed Park and Trail Occasional lift days with regular local rides |
Use the wheel size specified by the frame; 29 in favors rollover, while 27.5 in favors agility | 170–180 mm only when the frame is approved for a dual crown and the geometry remains suitable | Local technical trails, occasional bike parks, moderate jumps, and varied downhill terrain | Moderate travel, adjustable damping, manageable weight, and compatibility with the frame's head tube, cable routing, and front wheel | Do not increase travel solely to gain performance. Confirm axle standard, steerer type, tire clearance, and the manufacturer's maximum fork length. | More versatile than a full race-focused setup; improved front-end control on steep or rough sections | Still heavier and less practical for climbing than a single-crown trail or enduro fork |
Compatibility check: Travel and wheel size must match the bicycle frame's approved specifications. Before installation, verify axle diameter and width, wheel clearance, steerer and crown compatibility, brake mount requirements, tire clearance, axle-to-crown length, and the frame warranty conditions. Never select a longer fork solely because it offers more travel.
A dual crown fork changes steering geometry more than many riders expect. Measure axle-to-crown length, offset, and intended travel before choosing one. A longer fork can slacken the head angle and increase wheelbase. It may feel stable downhill, but slower during tight, low-speed turns. Trail matters too. More trail usually improves stability, although the steering can feel heavy on technical climbs. Do not judge geometry from travel alone.
Frame compatibility needs careful measurement. Check the head tube length, upper and lower crown clearance, steerer diameter, and headset standard. The lower crown must clear the frame without touching the down tube. Also confirm wheel size, axle spacing, tire width, and brake mount position. A fork can fit the wheel but still fail at the frame. That mistake is expensive.
Installation is not just a bolt-on task. Inspect the steerer for correct length, install the matching crown race, and set headset preload before tightening the stem. Use a calibrated torque wrench on every critical fastener. Check brake hose length through full compression and steering movement. In workshop testing, I also mark the stanchion and inspect cable rub after the first ride. My earlier assumption that “more travel is better” proved too simple. Geometry, clearance, and setup quality decide whether the fork feels controlled or awkward. Small measurement errors matter.
2026 How to Choose the Right Dual Crown Fork?
Balancing performance, durability, weight, and purchase cost requires more than comparing travel numbers. In workshop testing, a stiff dual crown fork improves steering accuracy on steep, rocky trails. However, extra stiffness can increase weight and transmit sharper impacts to the frame and rider. Check the axle standard, steerer diameter, brake clearance, and frame approval before comparing prices. A fork that does not fit correctly becomes an expensive mistake. That matters.
Durability depends on more than thick crowns or attractive finishes. Inspect bushing quality, seal design, damper adjustment, and replacement-part availability. Regular cleaning after muddy rides protects the seals and reduces service costs. I once chose a lighter fork for a long descent, but its limited adjustment made the ride harsher than expected. That decision still needs reflection. Weight savings are useful, yet control and reliable damping usually matter more during repeated impacts.
Tips: Set a realistic budget that includes installation, service, and spare parts. Compare the complete ownership cost, not only the checkout price. Test the fork’s compression and rebound range with your actual riding gear and tire pressure. If you ride downhill frequently, prioritize chassis stiffness and heat-resistant damping. For occasional use, a simpler model may offer better value. Leave room for uncertainty; laboratory figures cannot fully predict trail behavior.